
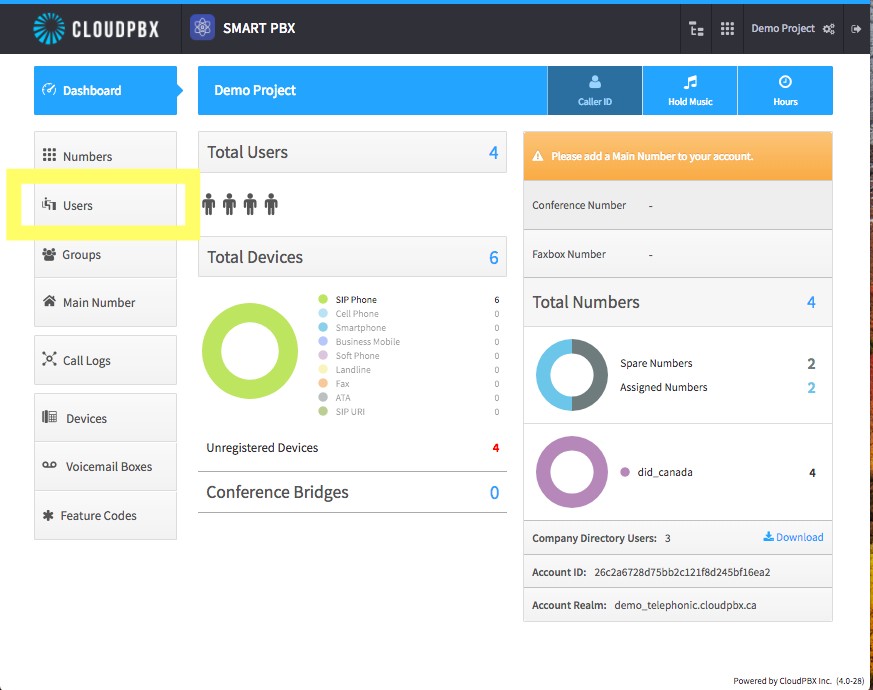
1. Select "Users" on the left hand pane:
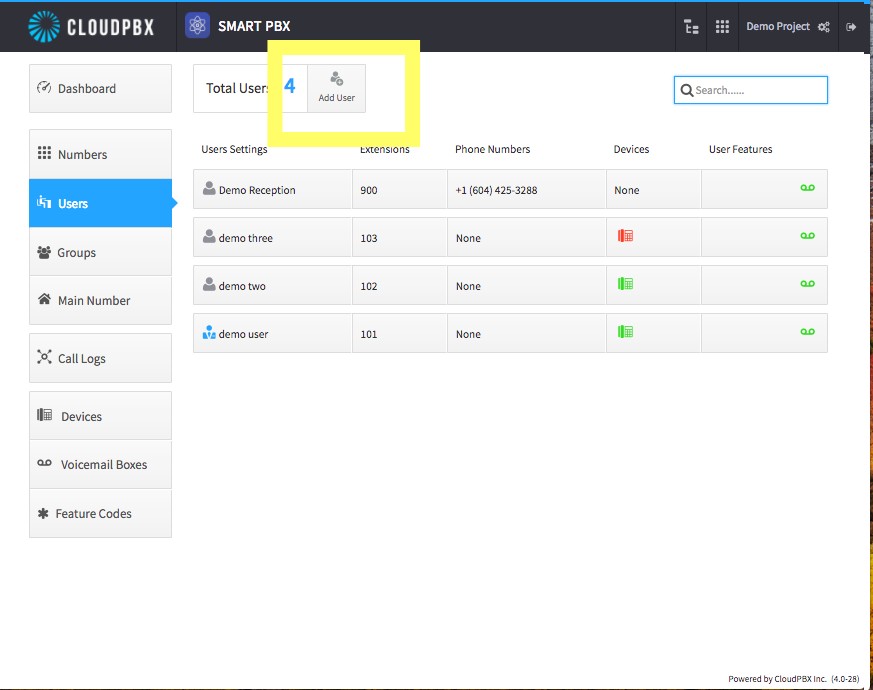
2. Once you've opened the user dashboard select on "Add User" at the top of the screen:
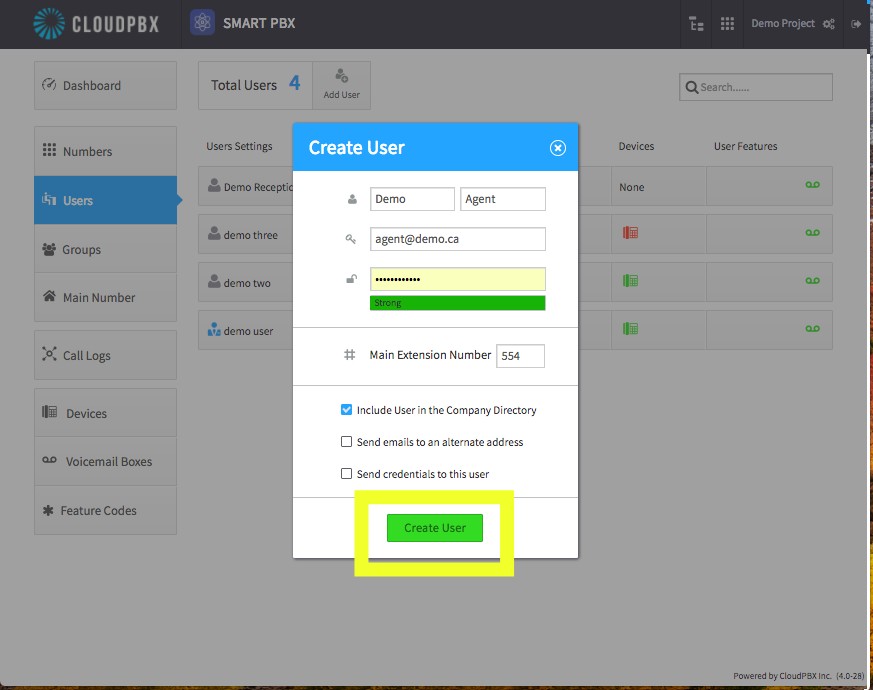
3. The 'Create User' window will open, here you can completely customize and create new user credentials for the Smart PBX platform. Create a customized User Name, User E-Mail, Password and Extension:
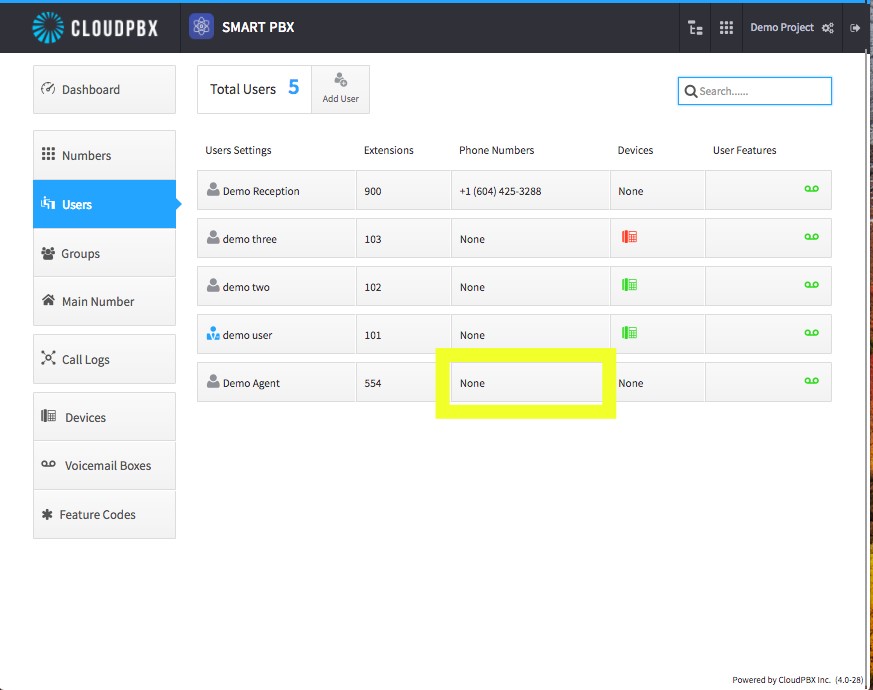
4. The User will then be created and visible on the Smart PBX Users dashboard. In this example we've named our user "Demo Agent". Once you see that the User you wanted has been created, you have the option of creating a direct number for them. This step is optional and not required for the phones to function, but if you would like to have a DID (direct number) then the next few steps will walk you through how to do that.
5. Select the empty phone number field for the User:
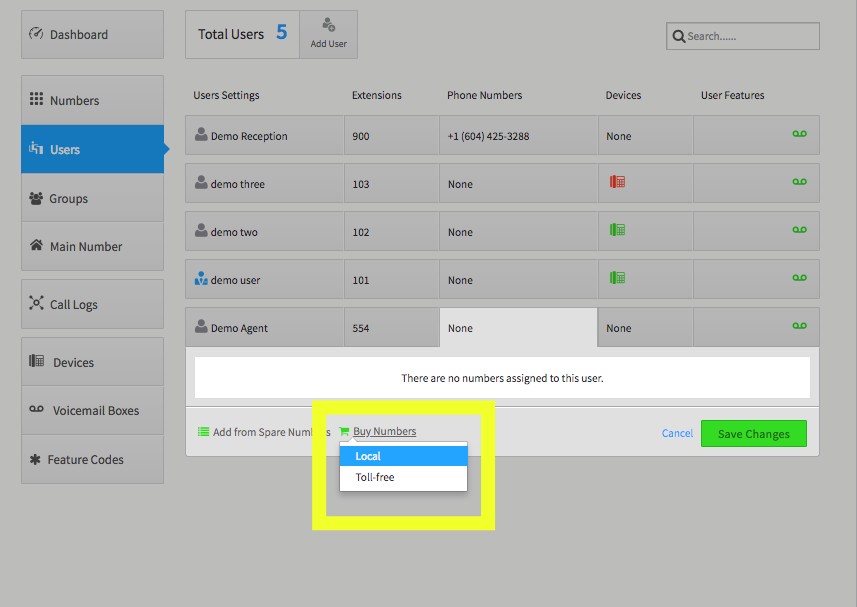
6. The 'Numbers Portal' will open. On the bottom of the new window you will see a shopping cart in green, which when selected gives you the option of creating numbers that can be used for the direct line of your new user. In the highlighted box you select "Local":
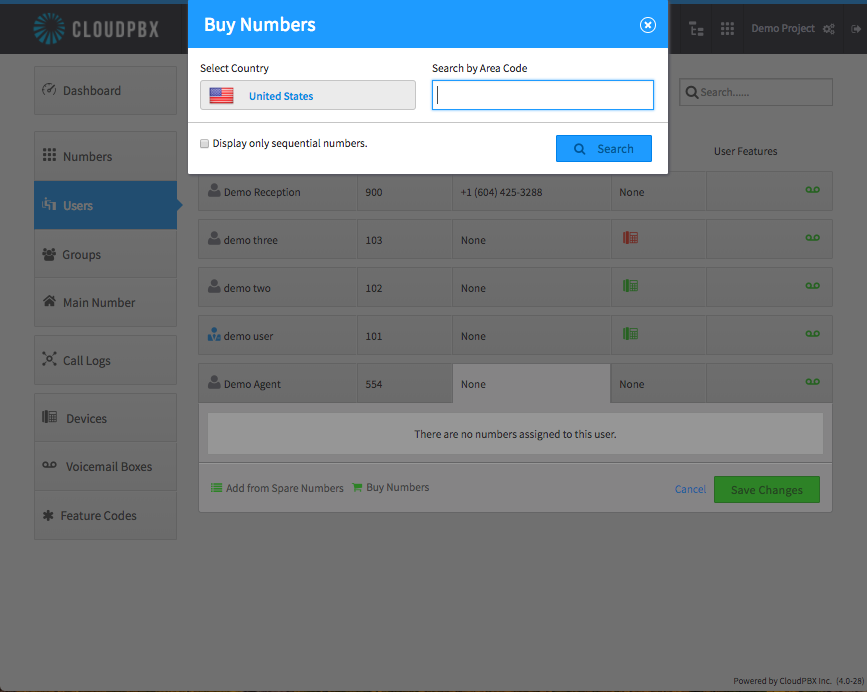
6. The numbers dialogue will open. Note that the "United States" is locked as the only available country to create numbers from. However, this is not to be too concerned with as if you require a Canadian number it will search and deliver those as well - despite it reading "United States". Canada and the USA share the same dialling codes. In this example we will search, "604":
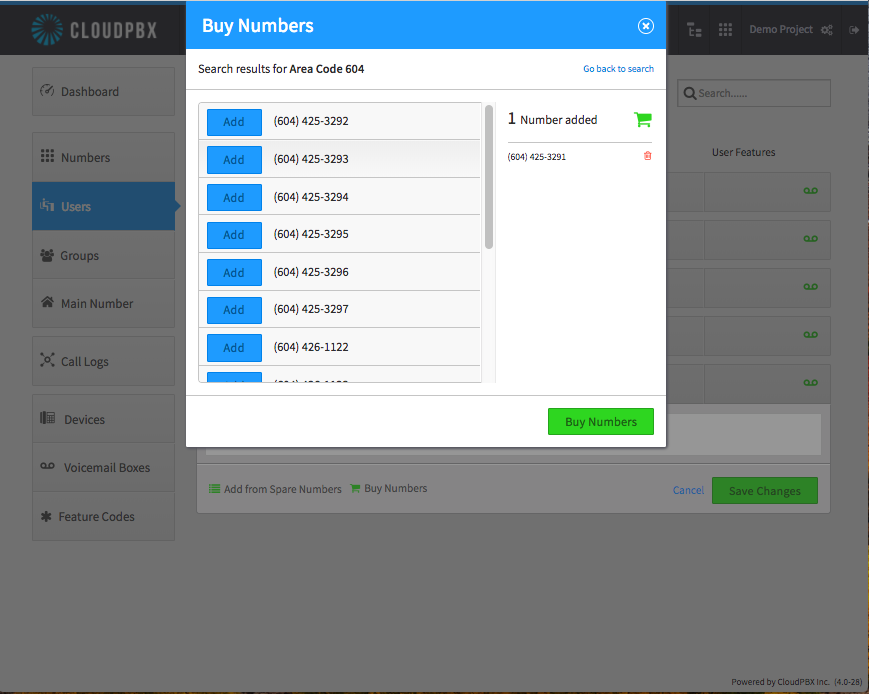
7. The Numbers Portal generates the area code, "604" and brings up a plentiful selection of numbers to choose from. In this example we are selecting "Add" on the first one at the top and then selecting "Buy". Note that by doing this process independently there is no charges that will be processed. By selecting "Buy Numbers" you will not actually be charged anything at this time, it is just how the button reads. Activating numbers using this method is free of charge:
8. The Wizard will then configure the number for the new user. It takes only a few seconds:
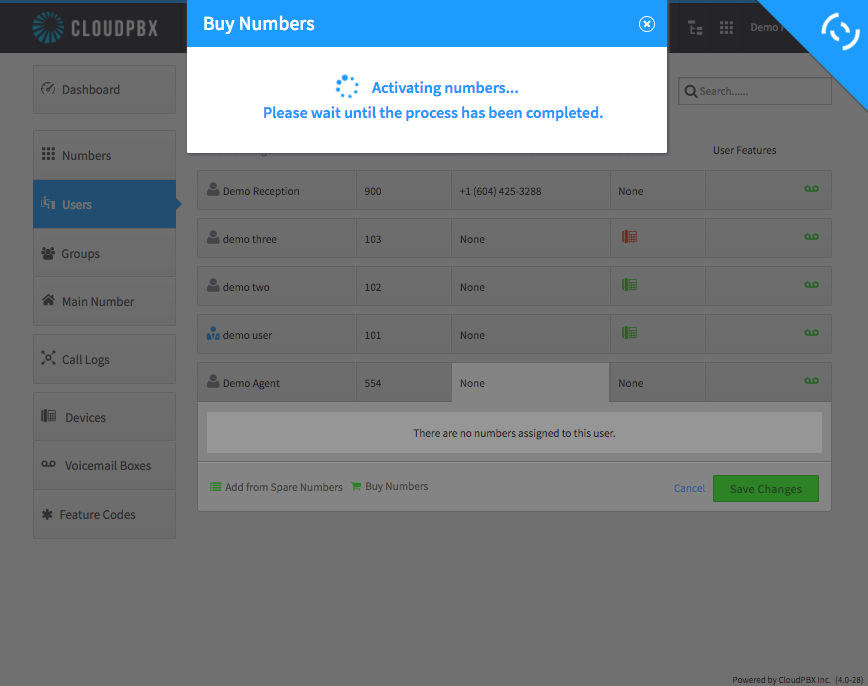
9. Once completed, the number will appear as assigned in the new users phone number field. Select "Save Changes". The Phone Number field will close:
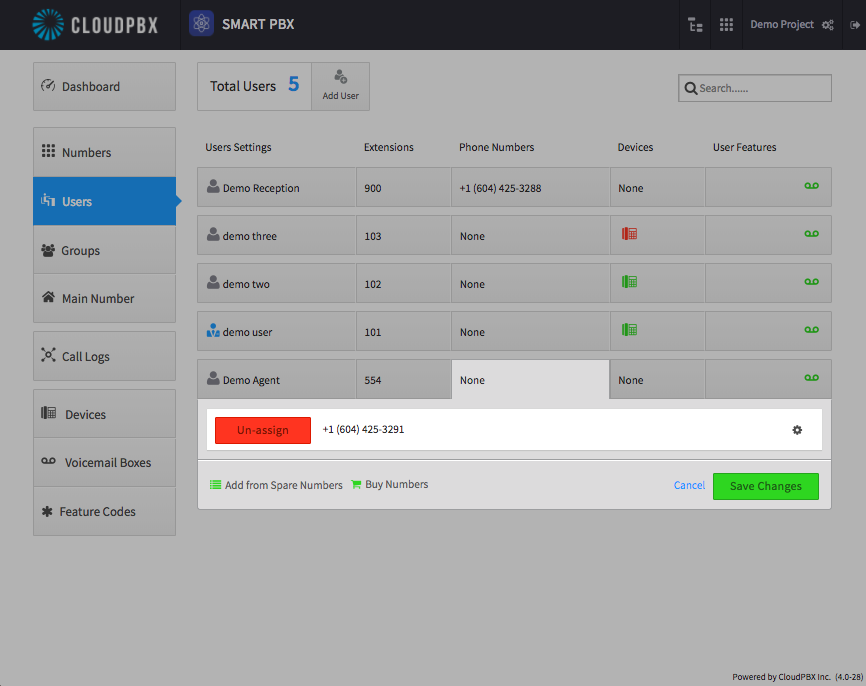
10. So far so good! Now you just have to set up the device that will be used to call from that generated number. Once the Numbers window closes, select on the "Devices" field:
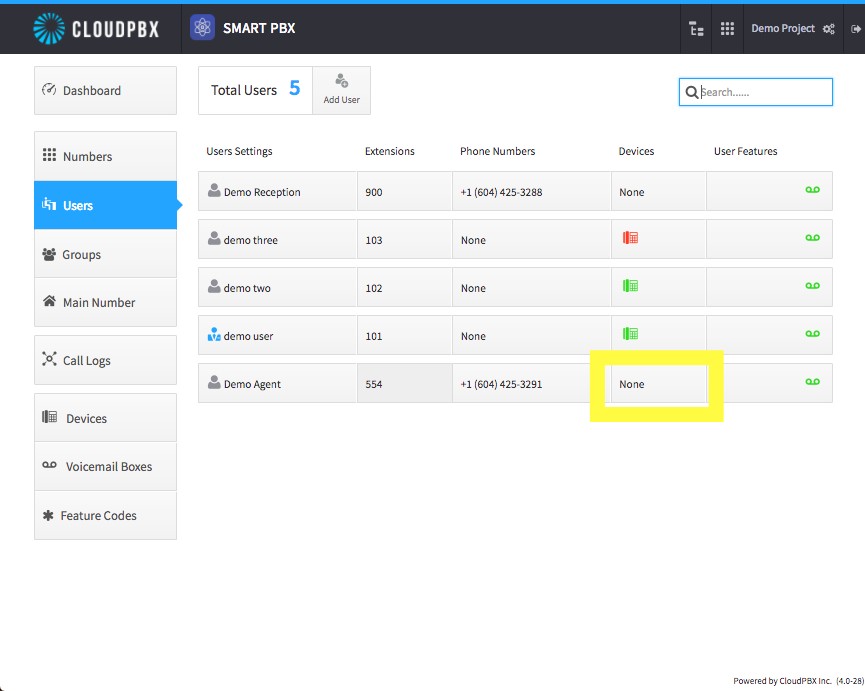
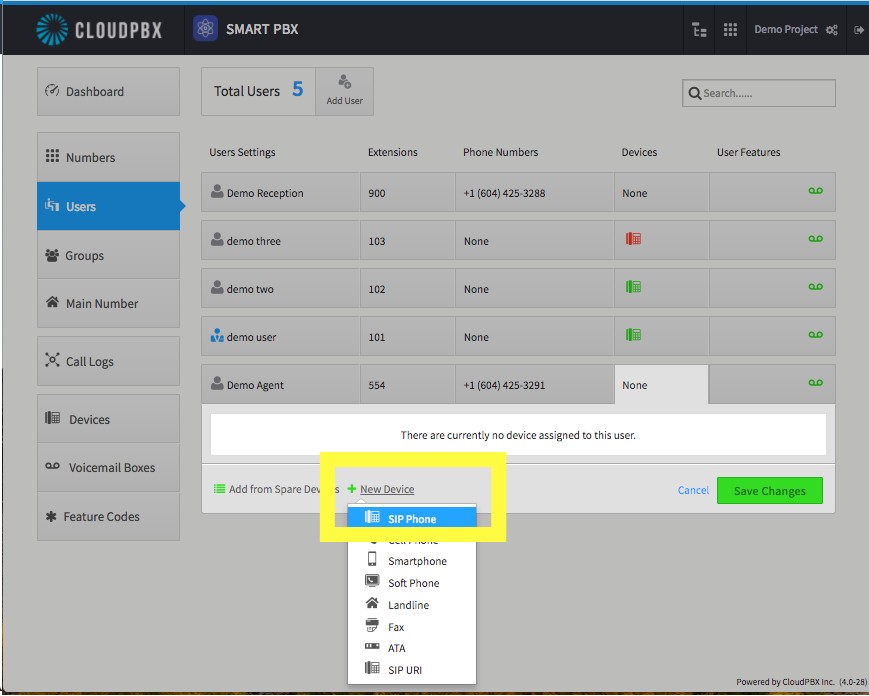
11. The Devices Window will open. Since we are creating a new user we will be creating a new device to add. In this situation we will be selecting "SIP Phone" but as you can see you can also set up different types of phones as well:
12. The "Adding a SIP device" window will open. Customize the fields with the credentials you would like to use for the provisioning of the device. In this example we named the device "Demo_Agent" for congruency with the User added. And the Username, for congruency, we named it the same as the extension. This is what will be used as a credential for the provisioning of the device later. Enter the password you would like to use, and then press the green "Create Device" button:
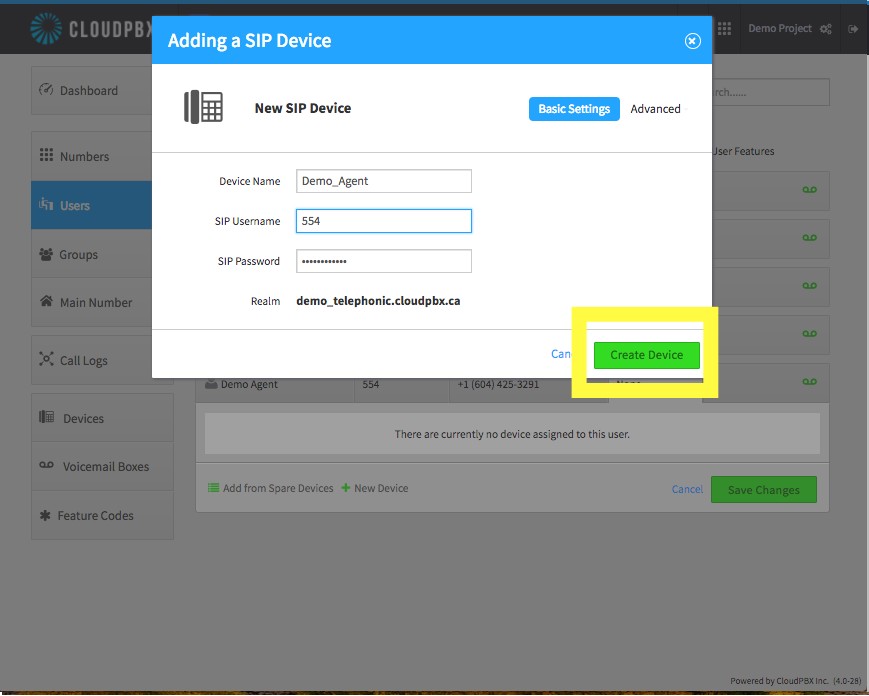
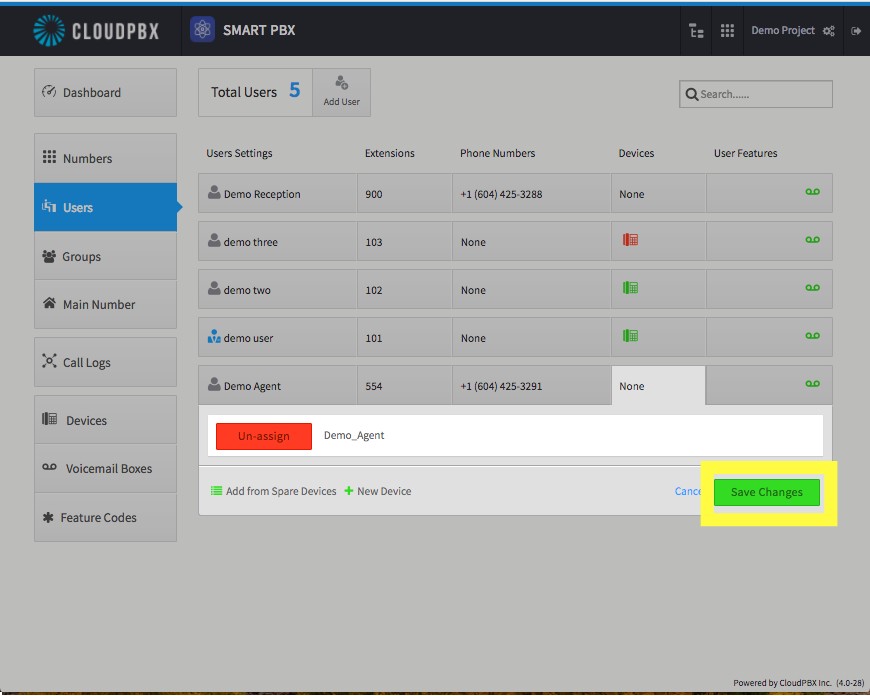
13. After configuring the device and pressing "Create Device" the window will close and return to the devices window. Now you will see that "Demo_Agent" (or the name of the device you chose to use) as "assigned". You can Un-assign this number and try the process again if you choose to change the credentials or assign different numbers as well. If you are happy, press on "Save Changes" as shown below:
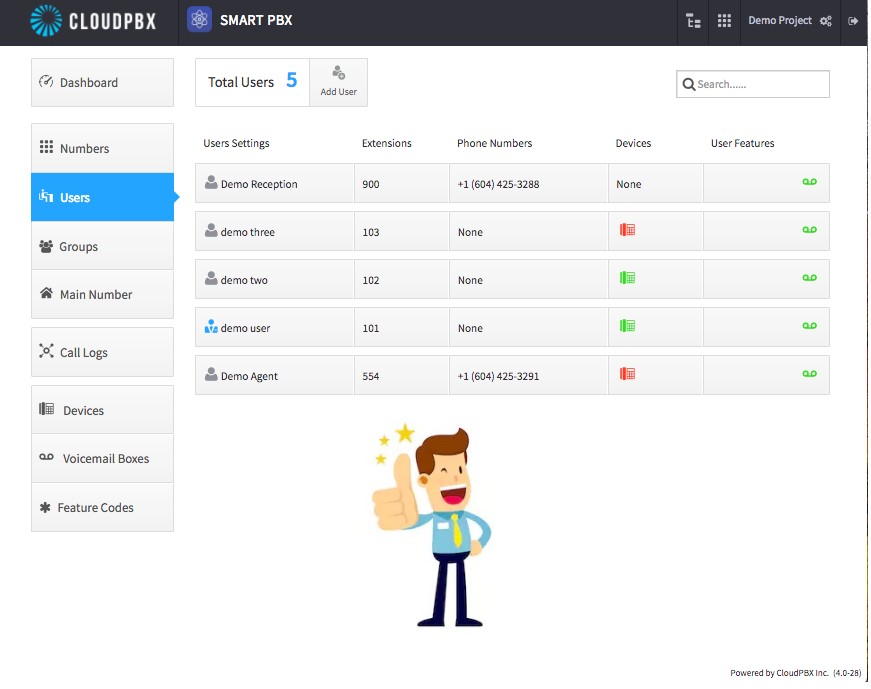
14. That's it! You've done all the necessary steps for configuring a user in Smart PBX. Now you may be wondering why the device appears in red. This simply means that the device has yet to be provisioned, which will need to be done through the 'devices' web interface, and upon the phone itself:
We hope that this has been helpful and if you have any further questions please let us know.
Comments
0 comments
Article is closed for comments.