
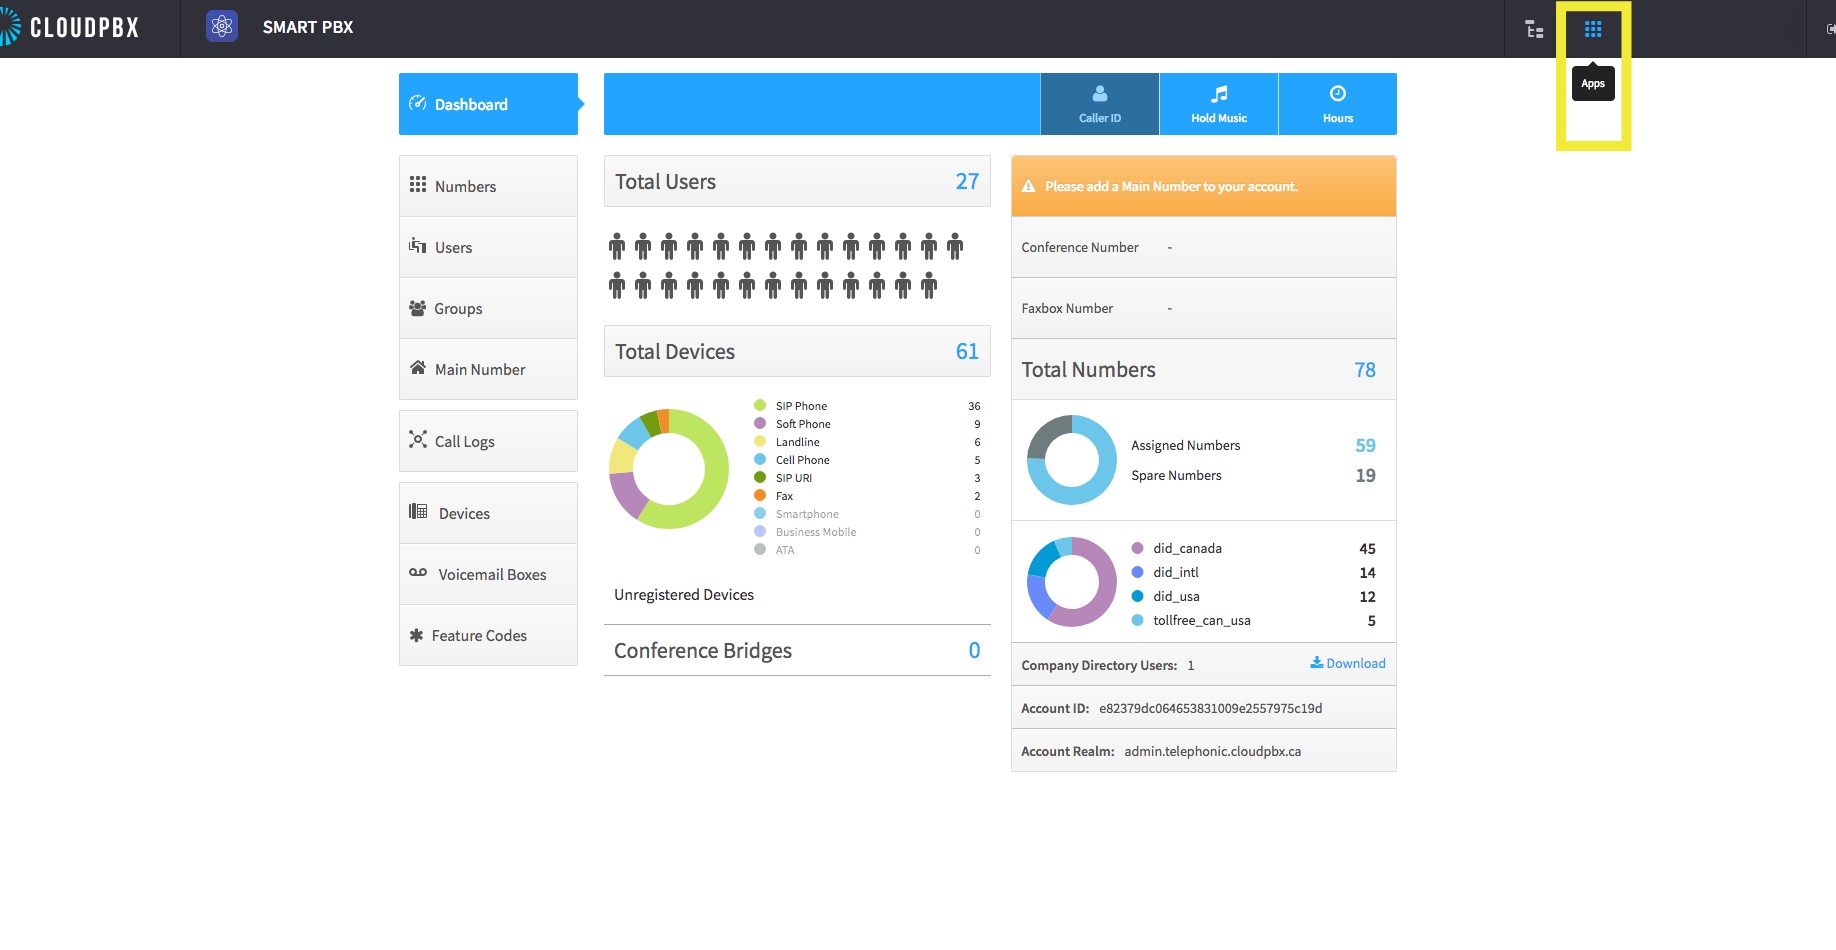
1. Begin on the landing page by selecting the highlighted apps icon on the navigation pane:
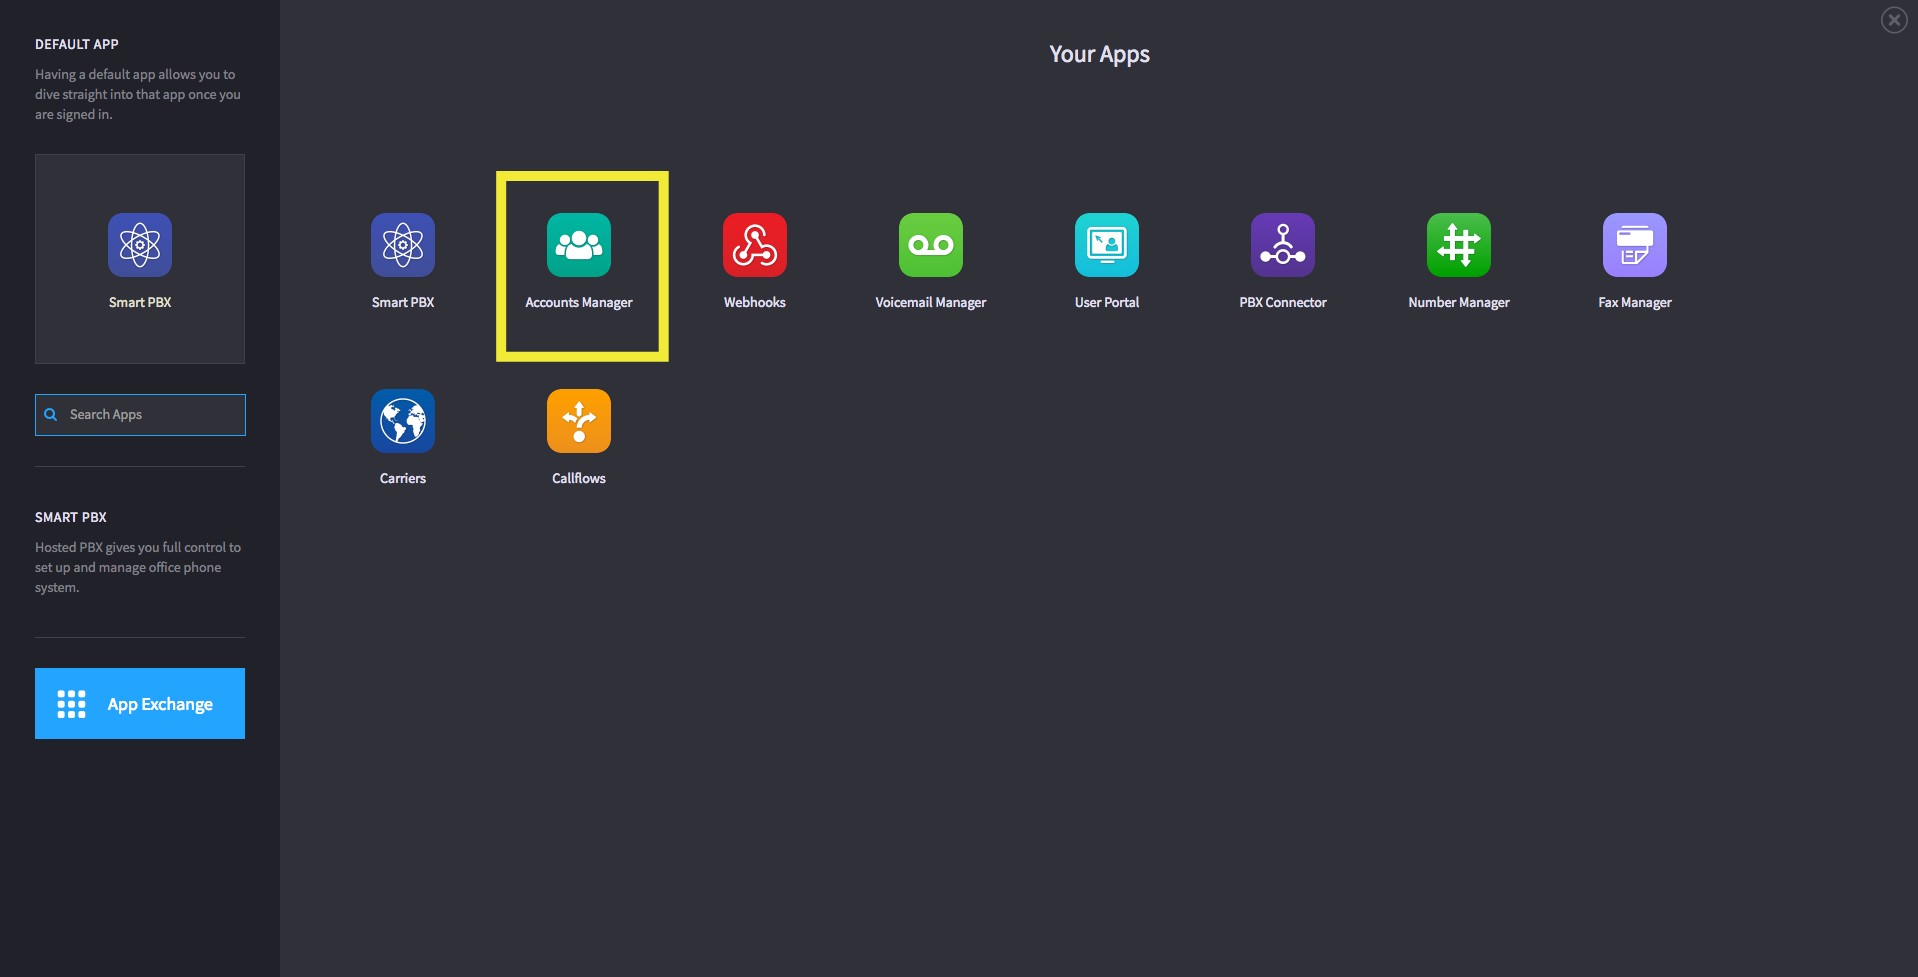
2. Select on the "Accounts Manager" icon. If the icon is not visible then you will need to reach out to your network administrator:
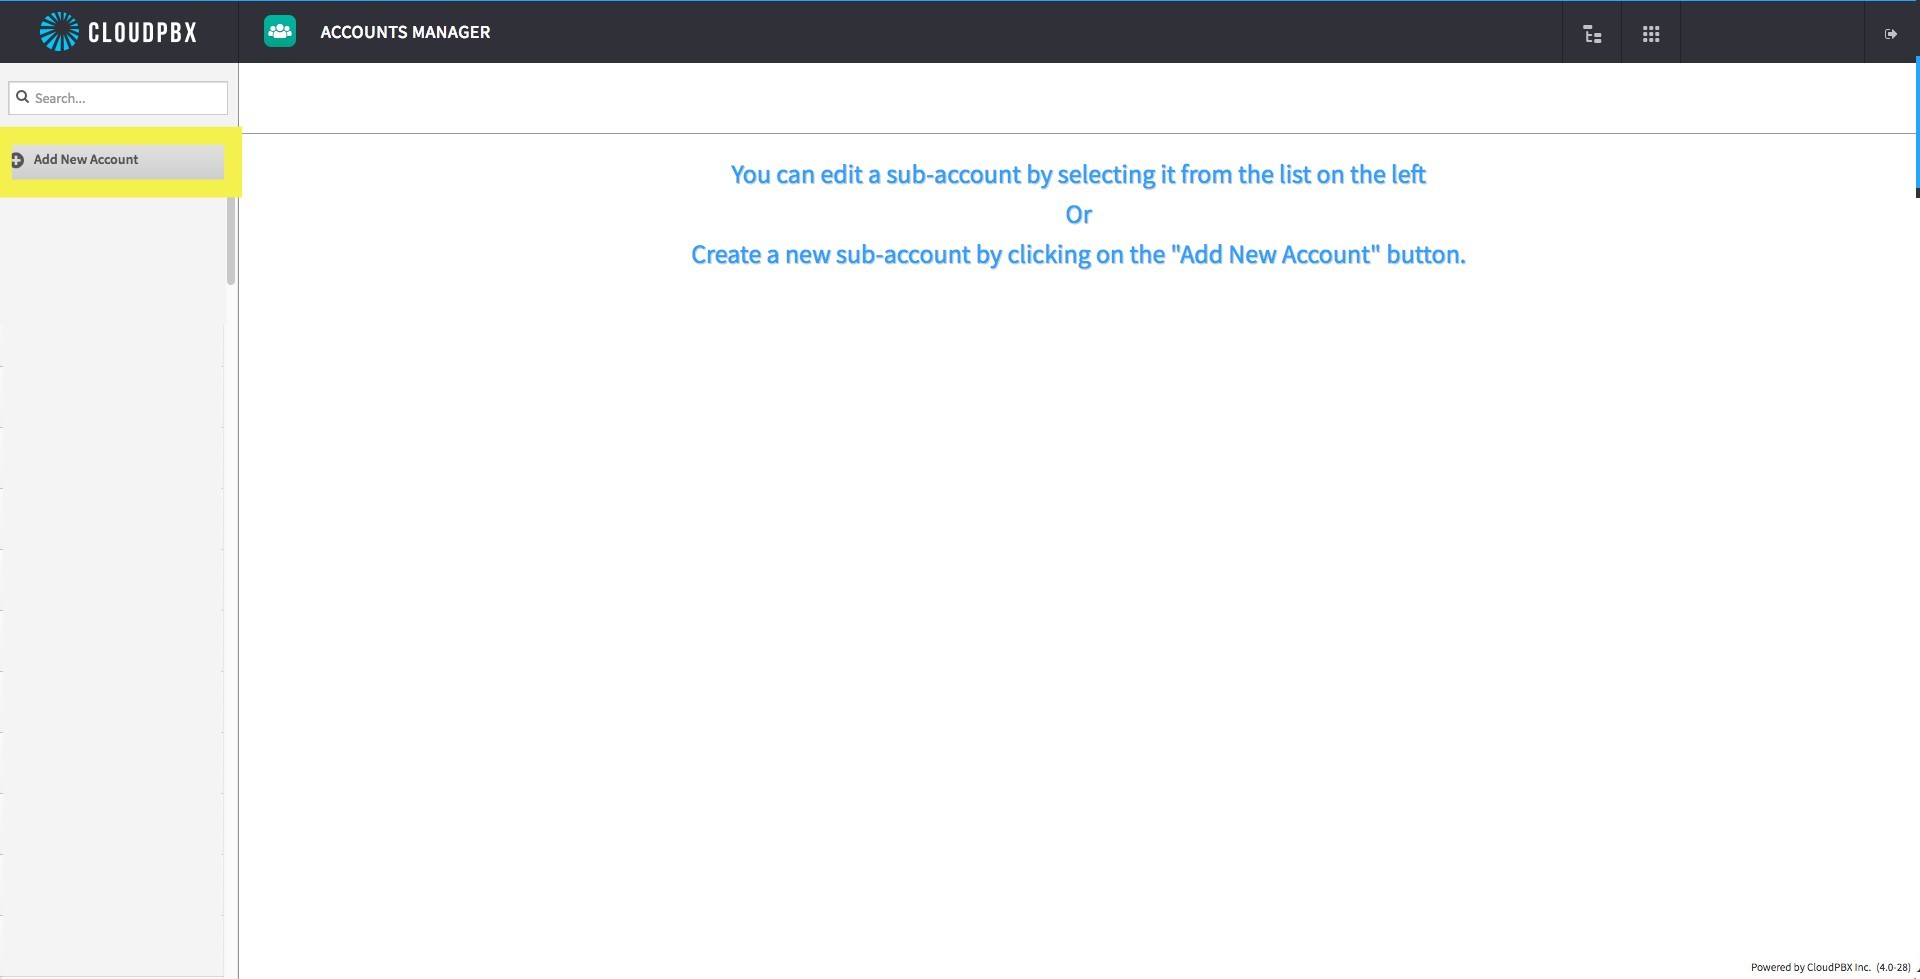
3. The Account Manager page will open and you will be prompted to input the details of your account creation as demonstrated below. Follow the order of input requirements:
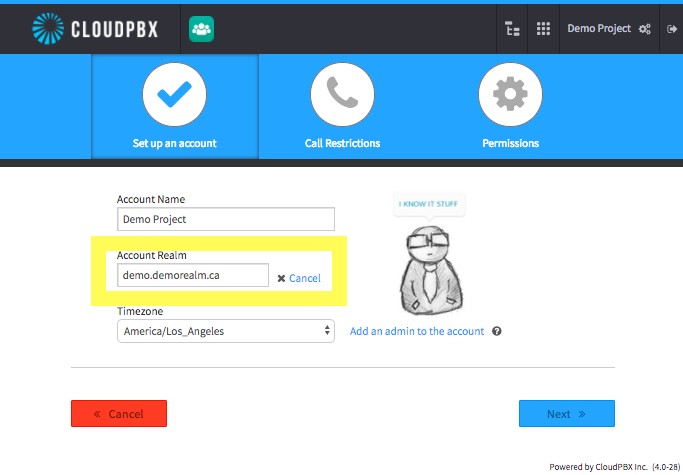
4. Name your project. For this example we're going to go with, "Demo Project":
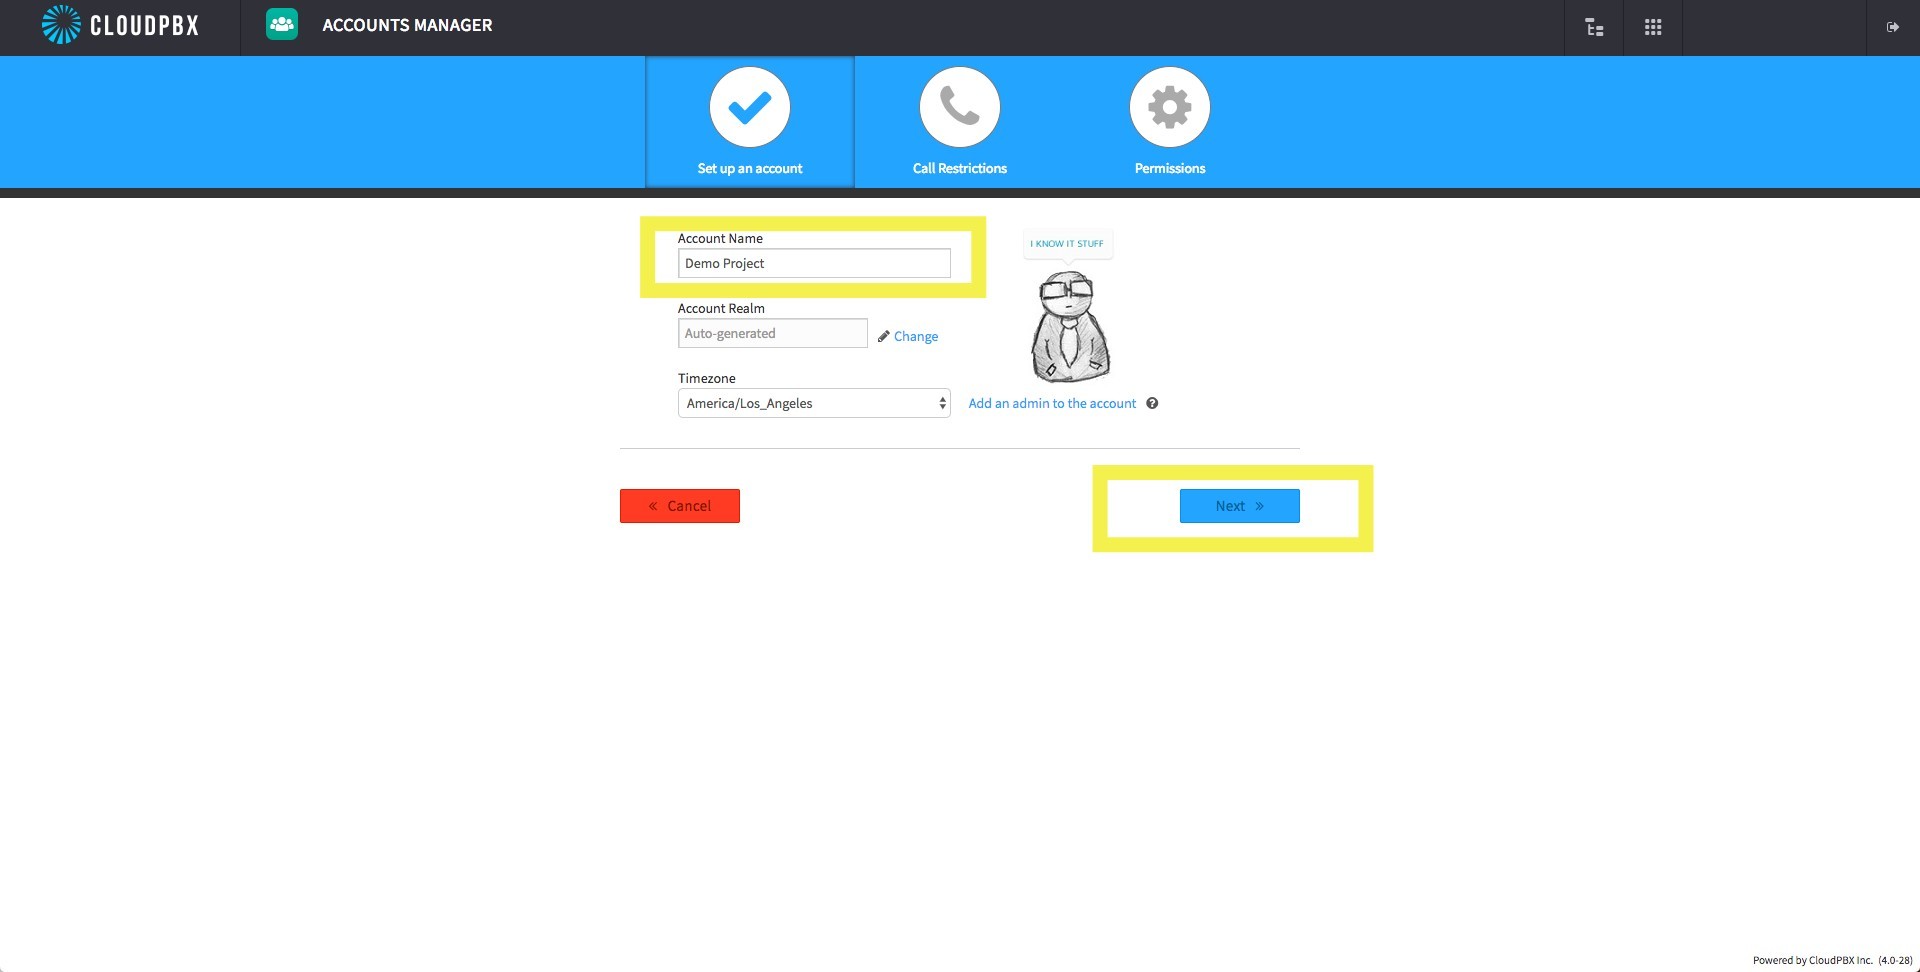
5. The next important step is below the account name in "Account Realm". Click on "Change" beside it and input the realm you would like to use for your account. For this example we will be using, "demo.demorealm.ca". This must be a FQDN.
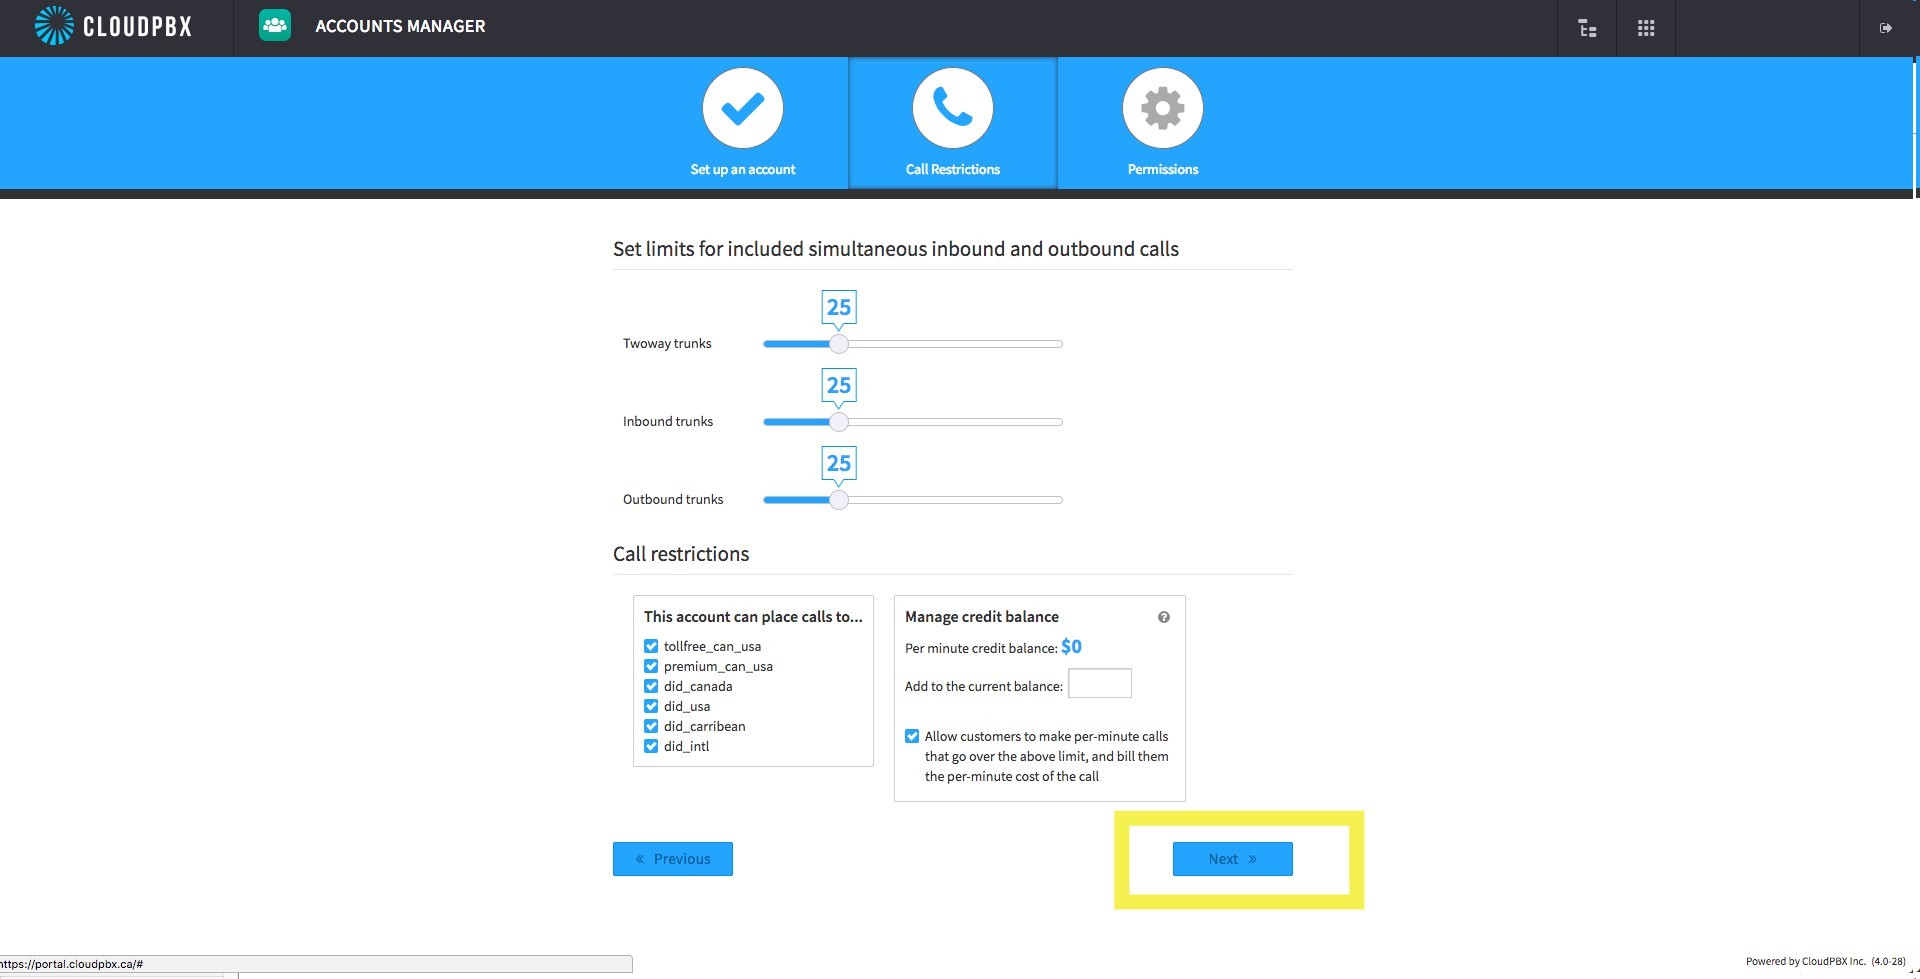
6. Set limits for the simultaneous inbound and outbound calls based on your organizations needs:
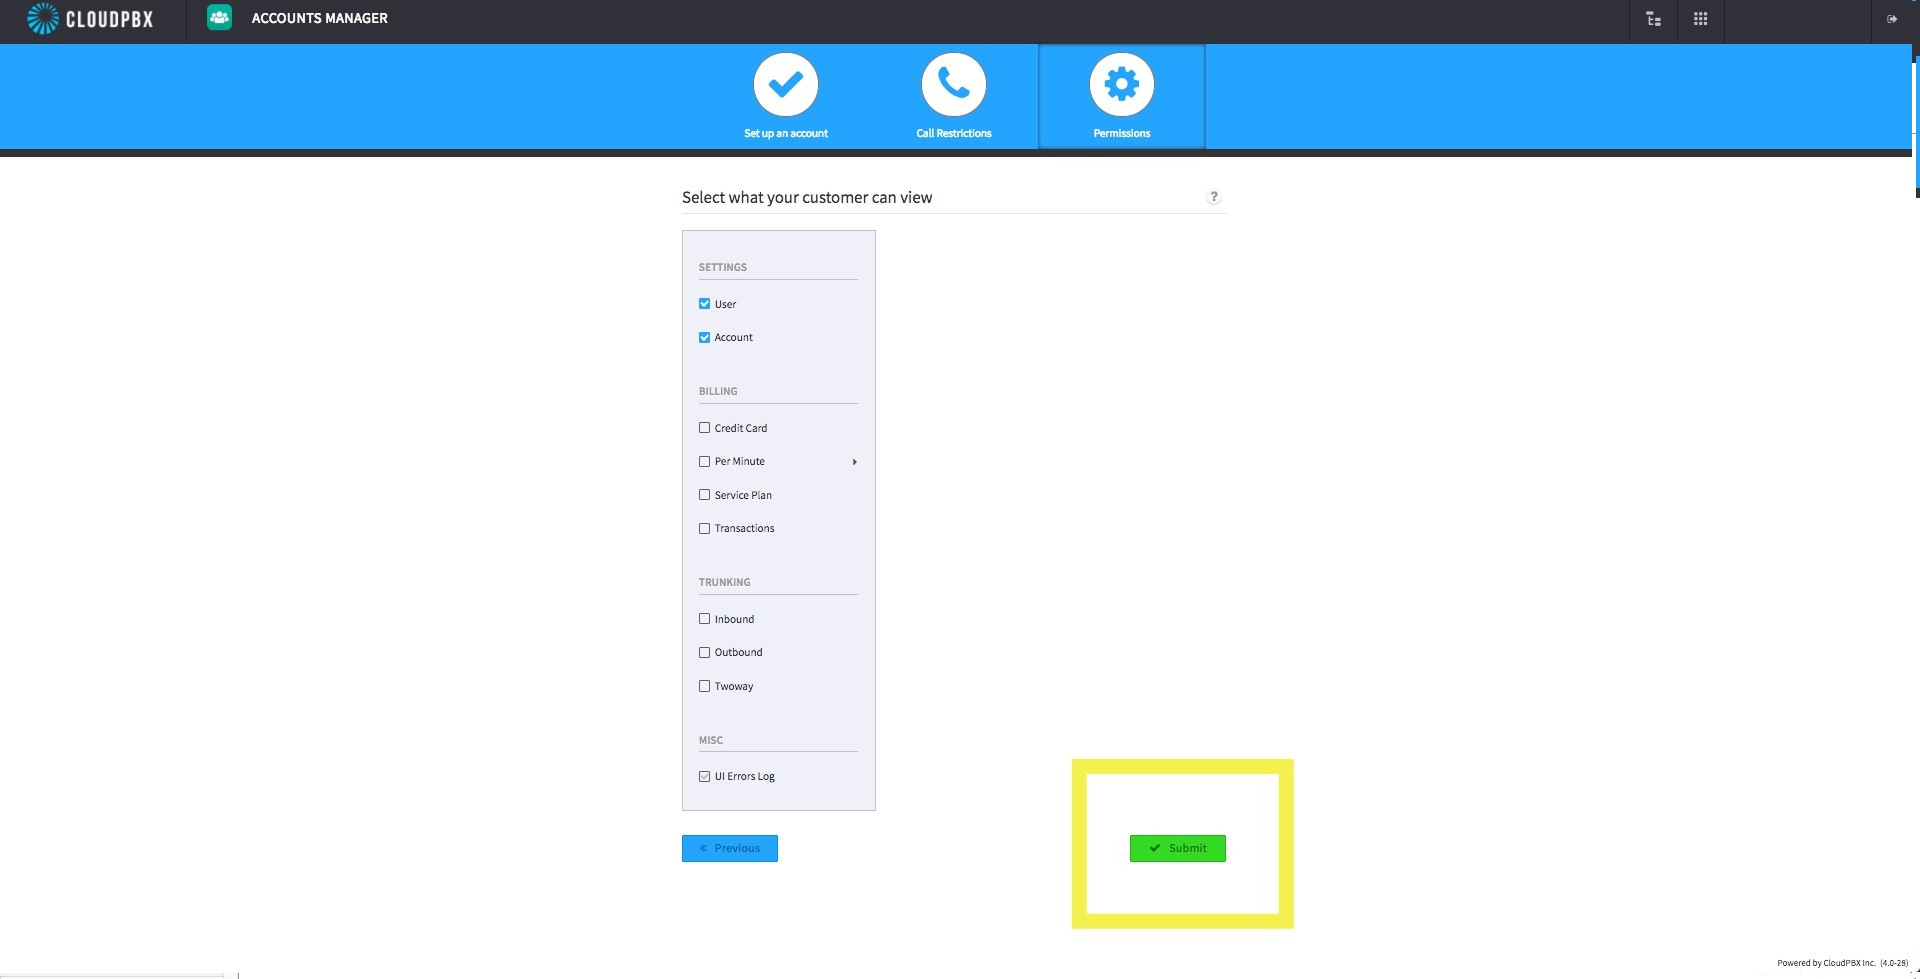
7. Select what your customers can view by checking the boxes on the side pane. Finish by clicking on the big green "Submit" button.
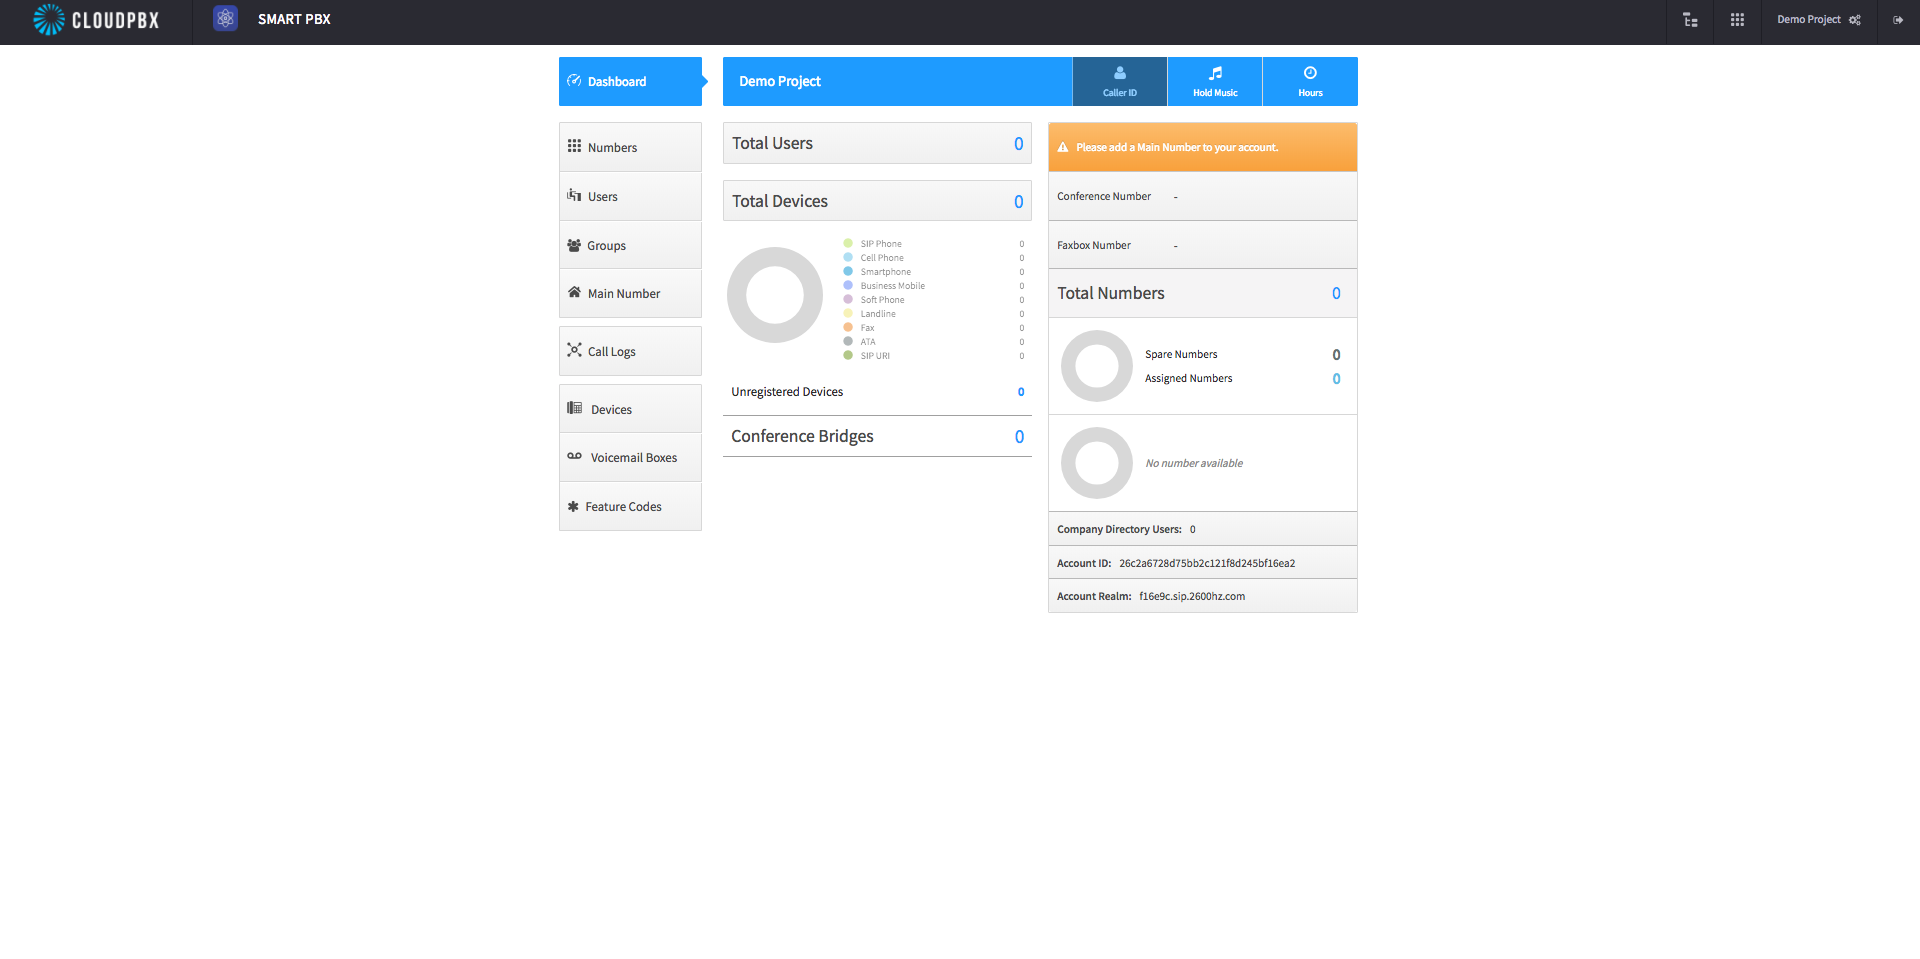
8. Great work! Now you have the account created. In this example we've named it "Demo Project."
Comments
0 comments
Article is closed for comments.